Thursday, December 23, 2010

Cranberry Cake w/ Vanilla Sauce

This is a simple cake that contains fresh cranberries. The tartness of the cake is balanced by the sweetness of the vanilla sauce.

Cranberry Cake
1 cup milk
1 cup sugar
2 cups flour
1/4 tsp salt
1 Tbsp baking powder
3 Tbsp melted butter
3 cups (1 bag) fresh cranberries

Mix above ingredients together, then fold in cranberries.
Bake in a greased 10" round pan for 8x8 square pan at 390 for 40 minutes.

Vanilla Sauce
Melt in a sauce pan:
1 1/2 cups butter (3 cubes)
Add and bring to boil for 2 minutes:
1 1/4 cups sugar
1/2 cup cream
Remove from heat and add:
1/2 tsp vinegar
2 tsp vanilla

Saturday, December 18, 2010

Marshmallows - The Next Level

Some things you learn the hard way....like knowing that you should never vacuum seal chocolate chips.
Since I had a giant block of good quality mini chips in the pantry, I decided to take the peppermint marshmallows up a notch.
Marshmallows are difficult to dip, because they melt quickly.
I just poured chocolate onto one side of the mallows,
then sprinkled with crushed candy cane.
A little candy striped ribbon....voila.
I highly recommend it.
(The dark chocolate coating, not the vacuum sealing.)

Christmas Toffee

My friend Amy shared this recipe with me about 15 years ago. I've been making it at Christmas time ever since!

1 lb butter (4 sticks)
2 1/2 cups granulated sugar
1/4 cup light karo syrup
1/2 cup water
2 cups (1 bag) chocolate chips
1 cup chopped nuts (optional)

Butter a cookie sheet or jelly roll pan well.

If using nuts, sprinkle half of the chopped nuts onto buttered cookie sheet.

Combine butter, sugar, karo, water in large sauce pan.

Bring to a boil over medium-high heat.

Cook to 280-290 degrees, stirring constantly to prevent burning.

Pour onto buttered cookie sheet. Let sit for 5 minutes.

Sprinkle chocolate chips over surface of toffee. Allow to sit until melted. Spread with rubber spatula.

If using nuts, sprinkle remaining chopped nuts over melted chocolate.

Cool completely, then break into pieces.


Sunday, December 5, 2010

Cranberry Orange Walnut Muffins

I am LOVING fresh cranberry season. Below is a simple and yummy recipe for muffins.


CRANBERRY ORANGE WALNUT MUFFINS

2 cups flour
1 cup sugar
1 Tbsp baking powder
1/2 tsp salt
zest of 1 orange
1 egg, beaten
1 cup orange juice
1/4 cup vegetable oil
1 cup cranberries
3/4 cup walnuts

Chop cranberries and walnuts and set aside.

Combine dry ingredients in a medium bowl and mix well.

In a small bowl, beat egg. Whisk in orange juice and oil.

Slowly add the wet mixture to the dry ingredients, stirring until combined. Fold in walnuts and cranberries.

Portion into lined cupcake tin (I made 16 muffins).

Bake at 350 for 22 - 24 minutes.

Cool on wire rack.

Thursday, December 2, 2010

Cranberries!

nature's perfect treat!

I can't get enough of these little sweet tarts and they are SOOOOO easy to make.

1 bag fresh cranberries
1 egg white
1 cup sugar

Place cranberries in a medium sized bowl.

In a small bowl, beat the egg white until light and fluffy (but not to stiff peaks).

Add the egg white to the cranberries one spoonful at a time, just until coated (you won't need all of it - I used two spoonfuls).

Pour one cup of sugar over the berries and combine until coated.

Place berries onto a cookie sheet and let dry/harden for a few hours or overnight. Refrigerate in an airtight container.

eat.

make another batch.

Sunday, November 28, 2010

Sourdough Rolls (with starter)

1 cup sourdough starter
1 1/2 cups warm water
1 Tbsp yeast
1 Tbsp salt
2 Tbsp sugar
2 Tbsp olive oil
3 - 4 cups flour
butter, melted

Line a 9 x 13 pan with parchment paper.

In a large bowl combine starter, water, yeast, salt, sugar and oil.

Stir in flour, adding flour 1/2 cup at a time.

Knead well either in mixing bowl or on a floured surface.

Place dough in a bowl and cover, set in a warm place to double in size (2 hours).

When double, punch down and form into rolls.

Place in prepared pan and let rise until doubled (2 hours).

Bake 20 - 25 minutes at 375 degrees.

If desired, brush with melted butter in the last 5 minutes and return to oven.


Saturday, November 20, 2010

Sunday, November 14, 2010

Homemade Peppermint Marshmallows [Re-post]

Homemade Peppermint Marshmallows
3/4 cup water
4 packets Knox gelatin
3 cups sugar
3/4 cup water
1/2 tsp salt
1 1/4 cup light karo syrup
1 Tbsp peppermint extract (optional)
powdered sugar (for cutting)

'Tis the season for hot chocolate! Three years ago I got pretty ambitious on the holiday treats I made for our friends and neighbors. I'll admit I was slightly intimidated at first, but these really were pretty simple to make. A little messy, but nothing that doesn't clean up in 5 minutes with a sponge. Initial prep time is 30 minutes. Then the mallows must sit for 10-12 hours before cutting. Final prep is another 30 minutes. This makes 48 - 60 mallows, depending on how large you cut them. Yummy when added to hot cocoa!
Credit to Morgan at http://morganmoore.typepad.com/one_more_moore/ for inspiring me to try these. :)
If you're interested, here are step by step instructions and photos I put together.


1) Place 3/4 cup water and 4 envelopes Knox Gelatin in mixer bowl to "bloom."
2) Affix splash guard to mixer bowl so it will be ready when you add the hot syrup.


3) Mix 3 Cups Sugar, 3/4 cup water, 1/2 tsp Salt and 1 1/4 Cups Karo Syrup in a medium sauce pan.
4) Bring to boil with lid on and NOT stirring.


5) Once boiling, remove lid and continue to boil until syrup reaches soft ball stage (234 - 240 degrees). Do not stir.


6) With mixer on medium speed (and already containing gelatin/water mixture), add hot syrup. Then increase speed to High.

7) Mix on High for 8-10 minutes until stiff peaks form.
8) Add flavoring at the end so you can adjust to your taste. I added 1 Tbs Peppermint extract. You may also use vanilla if you don't like mint.


9) Pour hot mixture into a 9 x 13 pan, lined with parchment paper that has been sprayed with vegetable oil.


10) If desired, add red food coloring. I used 8 or 9 drops and spread around with a toothpick.

11) Let mallows sit uncovered at room temperature for 10-12 hours.


12) After 10-12 hours, dust a piece of parchment paper or cookie tray with confectioner's sugar. Invert mallows onto dusted sheet and peel away parchment paper. Sift sugar onto the surface you just uncovered.


13) Slice mallows with a pizza cutter (it's helpful to continually dust the pizza cutter with confectioner's sugar.


14) With each new cut edge, roll each side of the mallows in confectioner's sugar.

15) Dust off excess sugar before plating or packaging.


Voila!


We ended up doing one peppermint batch and one vanilla batch. Here they are, ready for delivery!
MERRY CHRISTMAS!

Vegetable Barley Soup

This soup is soup-er easy. It's a great last-minute meal, because I tend you have all of these ingredients on hand.
2 Tbsp olive oil
1 onion, diced
2 cloves garlic, minced
1 cup carrots, sliced
1 cup celery, sliced
1 medium potato, diced
1 can corn (or frozen)
1 can diced tomatoes with green chiles (with juices)
4 cups vegetable or chicken broth
1/2 cup barley
salt and pepper to taste

Saute veggies in olive oil for about 10 minutes. Add corn, tomatoes, broth and barley. Bring to a boil, then reduce heat and simmer for 30-45 minutes until potatoes and barley are cooked. Salt and pepper to taste. The green chiles in the diced tomatoes give it a nice kick if you like a little spice.

Jimmie grilled a small steak, diced it up and quickly made it a Beef, Barley & Veggie soup. Yum.

Serve with homemade foccacia.

Thursday, November 4, 2010

Chewy Carmel Corn

Carmel corn takes me back to my childhood. It seems like we made it every Halloween. Until last week, I hadn't made it in about 15 years. Now I remember what I've been missing!
Chewy Carmel Corn


1 cup unpopped popcorn
Pop popcorn -- I use a hot air popper
Place popcorn in the oven to keep it warm while making carmel.

In a medium sauce pan combine:

1/4 cup butter
1/2 cup light karo syrup
2/3 cup fat free sweetened condensed milk
1 cup brown sugar

Cook on med/high heat, stirring constantly. Remove from heat at 234 degrees. This is before the soft ball temp and keeps it chewy. If you let it go above 240 it will be more crunchy.

Add 1 tsp vanilla and stir.

Pour over popcorn and turn until mixed.

To make popcorn balls, put some butter on your hands to keep from sticking.
My favorite method is to put a sandwich bag over each hand, then rub a little butter on both bags. When I'm done I toss the bags in the garbage and my hands aren't sticky.

Wrap popcorn balls individually in saran wrap to keep them fresh.

Tuesday, November 2, 2010

Red Chicken Chili

Yum! Two chicken chilis in one week! This one is very different than the first. Here's what you need:
Red Chicken Chili

Saute:
2 Tbsp olive oil
1 onion
2 cloves garlic

Add:
1 can chicken broth
1 can chicken breast
1 can diced tomatoes
1 can white northern (or canellini) beans
1 can diced green chiles
1 jar (16 oz) green salsa
1 can corn (I used frozen)

Bring to a simmer until throughly heated. Garnish with cilantro and corn tortilla chips. This was about 5 minutes of effort and has a fantastic taste. Love it.

Saturday, October 30, 2010

White Chicken Chili

Jimmie is telling everyone he 'took second place' at the annual church chili cookoff yesterday. They announced a winner (which was neither of us), but no second or third place awards were given. We both made a pot of chili - mine was white chicken chili; his was black bean elk chili.

All I'm going to say about our little competition is a) he went around telling everyone which was his chili, then asking them which one they liked best; b) every last drop of mine was eaten, while his had leftover; c) several people have asked for MY recipe. The defense submits the above to the jury for deliberation. :) We're not competitive. at all.

White Chicken Chili

8 cups [cooked] white northern beans (or 5 cans)
2 (4 oz) cans diced green chiles
3 (14.5 oz) cans chicken broth
2 tsp ground cumin
2 tsp oregano
1 1/2 tsp cayenne pepper
3 cooked chicken breasts, shredded
2 tbsp olive oil
2 onions, diced
4 cloves garlic, diced

Cook and drain the beans ahead of time. I put 2 lbs of white northern beans in the crockpot on high for about 2.5 hours.

Cook and shred chicken breast. This can also be done ahead of time and refrigerated.

Saute the onion and garlic in olive oil. Combine all ingredients to crock pot and heat on low for 3-4 hours. Add salt to taste.

For thicker and creamier chili, place 3 or 4 cups of the beans in a blender and puree.

Garnish with shredded cheese and tortilla chips (optional).

Cranberry Cornbread

I've been adding cranberries to everything lately. So, naturally, when it came time to make cornbread for the annual chili cookoff, I decided to make a sweet bread and add cranberries. It turned out pretty great.

Cranberry Cornbread

Preheat oven to 400 degrees

2 cups flour
2 cups cornmeal
1 cup granulated sugar
1 tsp baking powder
1 tsp baking soda
1 tsp salt

2 eggs, lightly beaten
2 cups plain greek yogurt
2/3 cup milk
1/2 cup butter, melted
1 can creamed corn
1 cup dried cranberries

In a large bowl, combine flour, cornmeal, sugar, baking powder, baking soda and salt.

In a large bowl, lightly beat eggs. Add/combine yogurt, milk, melted butter and creamed corn.

Add the flour mixture and stir until combined. Fold in dried cranberries.

Bake in a greased 9x13 pan at 400 degrees for 40 minutes, or until golden brown on edges.

Thursday, October 28, 2010

Cran-Apple Walnut Crisp

There's a freeze warning tonight. We've turned the heater on. Fall is officially here. I had 6 'not-so-crunchy-anymore' apples in the fridge....and an idea. Here's my new spin on an old favorite.

Cran-Apple Walnut Crisp
preheat oven to 350

6 small apples, sliced thinly (skin on!)
1/4 cup dried cranberries
1/2 cup granulated sugar
1 Tbsp flour
1 Tbsp corn starch
1/2 tsp ground cinnamon
1 1/2 Tbsp lemon juice

*Mix ingredients and toss with apples. Place in an 8x8 casserole dish.

1/4 cup steel cut oats
1/2 cup chopped walnuts
1/2 cup flour
1/2 cup packed brown sugar
1/8 teaspoon baking powder
1/8 teaspoon baking soda
1/4 cup butter, melted

*Combine ingredients and sprinkle on top of apple mixture.
*Bake at 350 for 40 minutes.


These iPhone pictures don't do it justice.
Nutty, Crunchy, Apple-y goodness!

Saturday, October 16, 2010

5 Minute Chicken Taco Soup

I woke up from a nap today in the mood for homemade soup....chicken fajita soup...but too hungry to take the time to thaw and cook chicken. ENTER canned chicken!

Soup is a wonderful way to use it because you can't tell it came from a can. This is a soup you can make entirely with things in your pantry.

5 Minute Chicken Taco Soup

8 cups water
8 cubes chicken boullion
1 can diced green chiles
1 13 oz can chunk chicken breast
1 can black beans [with jalapenos]
1 can corn
1 Tbsp chili powder
1 tsp minced garlic
1/4 tsp onion powder
3 Tbsp lime juice

Bring to a boil and simmer a few minutes, breaking apart the chicken chunks.

Garnish with cilantro, crumbled tortilla chips, shredded cheese.

We inhaled it.

Saturday, October 9, 2010

Greek Yogurt: 1% + vanilla bean

Good news: This homemade Greek Yogurt recipe works JUST AS WELL with 1% milk! Yippee!


This time I also added a vanilla bean to the milk while it heated. That is why you see black specs in this pictures. It has a very vanilla flavor.


This is after 16 hours of incubation in the oven.
You can see the whey pooling, as it hasn't yet been strained.


This scoop shows how thick the yogurt is before straining - holds its shape in a spoon.
Second scoop

This is 1 gallon of yogurt, just placed in the strainer.

This time I strained it for 6 hours and it seemed to be the same thickness as the 2% after 8 hours.

The yield from 1 gallon of 1% milk was 11 cups of yogurt and 5 cups of whey.

11 cups is 14 - 15 servings.

1 gallon of 1% milk was $2.69.

Monday, October 4, 2010

French Silk Chocolate Pie

Have you read 'The Help' by Kathryn Stockett? If not, you must!

This is my attempt at Minny's chocolate custard pie. I think I'll be making this for book club this month.

My Mom says she's never had a french silk chocolate pie that she liked, but she LIKED this one. So there. It is very rich and sweet, so I added Cool Whip to balance the flavor.

I used a regular pastry crust, but think this would also be yummy in an oreo cookie crust or in individual ramekins without crust at all.

A standing mixer (KitchenAid) comes in handy with this recipe, since there is 10 minutes of mixing the eggs.


2 oz unsweetened baking chocolate (melted, then cooled)
1/2 cup butter, softened (it must be real butter)
3/4 cup white sugar
2 eggs (or egg substitute)*
1 tsp vanilla
1 prepared pie crust
Cool Whip (optional)
Chocolate shavings (optional)


Melt the chocolate in a pan over hot water, then let it cool.


Cream the softened butter and gradually add in the sugar.


Stir in cooled chocolate and the vanilla.


Add 1 egg. Mix for 5 minutes on medium speed.


Add the second egg. Mix for 5 minutes on medium speed.


Pour custard into prepared pie crust and chill for at least 2 hours.


Serve with Cool Whip and chocolate shavings.


*Obviously, if you are pregnant or have a problem with raw eggs, you should use a pasteurized egg substitute.

Friday, October 1, 2010

Pumpkin Conundrum

Well, it's officially October, and with October comes PUMPKIN!


Have you ever opened a can of pumpkin puree, used 1/4 or 1/2 cup in a recipe, then wondered what to do with the rest?


I did last week. I knew I wouldn't be using it again during the week, so I loaded up two silicone ice cube trays and made pumpkin cubes. The silicone trays are great, because you can pop out the cubes by pushing the mold inside out. Just toss them in a ziploc bag and you have small amounts of pumpkin puree any time you need it.


I just had a vanilla-pumpkin protein shake after my run. YUM!


What do YOU do with your leftover pumpkin puree?

Wednesday, September 29, 2010

Grecian Goddess

Yes, I think I may officially be a Grecian Goddess, now that I am proficient in the making of Greek Yogurt. Really.

The other day I was taking a poll on Facebook to see which brands of Greek yogurt my friends prefer. Enter Sheena, who suggested I MAKE. MY. OWN. Wha??

Making yogurt sounds crazy, right? Turns out it's the best kept secret among yogurt eaters. For starters, it TASTES so much better than store-bought. To top it off, it is so much CHEAPER! $1.39 is what I spent. That is the price of ONE Chobani yogurt at Target. FAGE is $1.59. Even at Costco or Sam's Club, you'll still pay over .90 cents per serving. My $1.39 made about 10 - 12 servings, which is perfect, because yogurt will keep for 2-3 weeks.

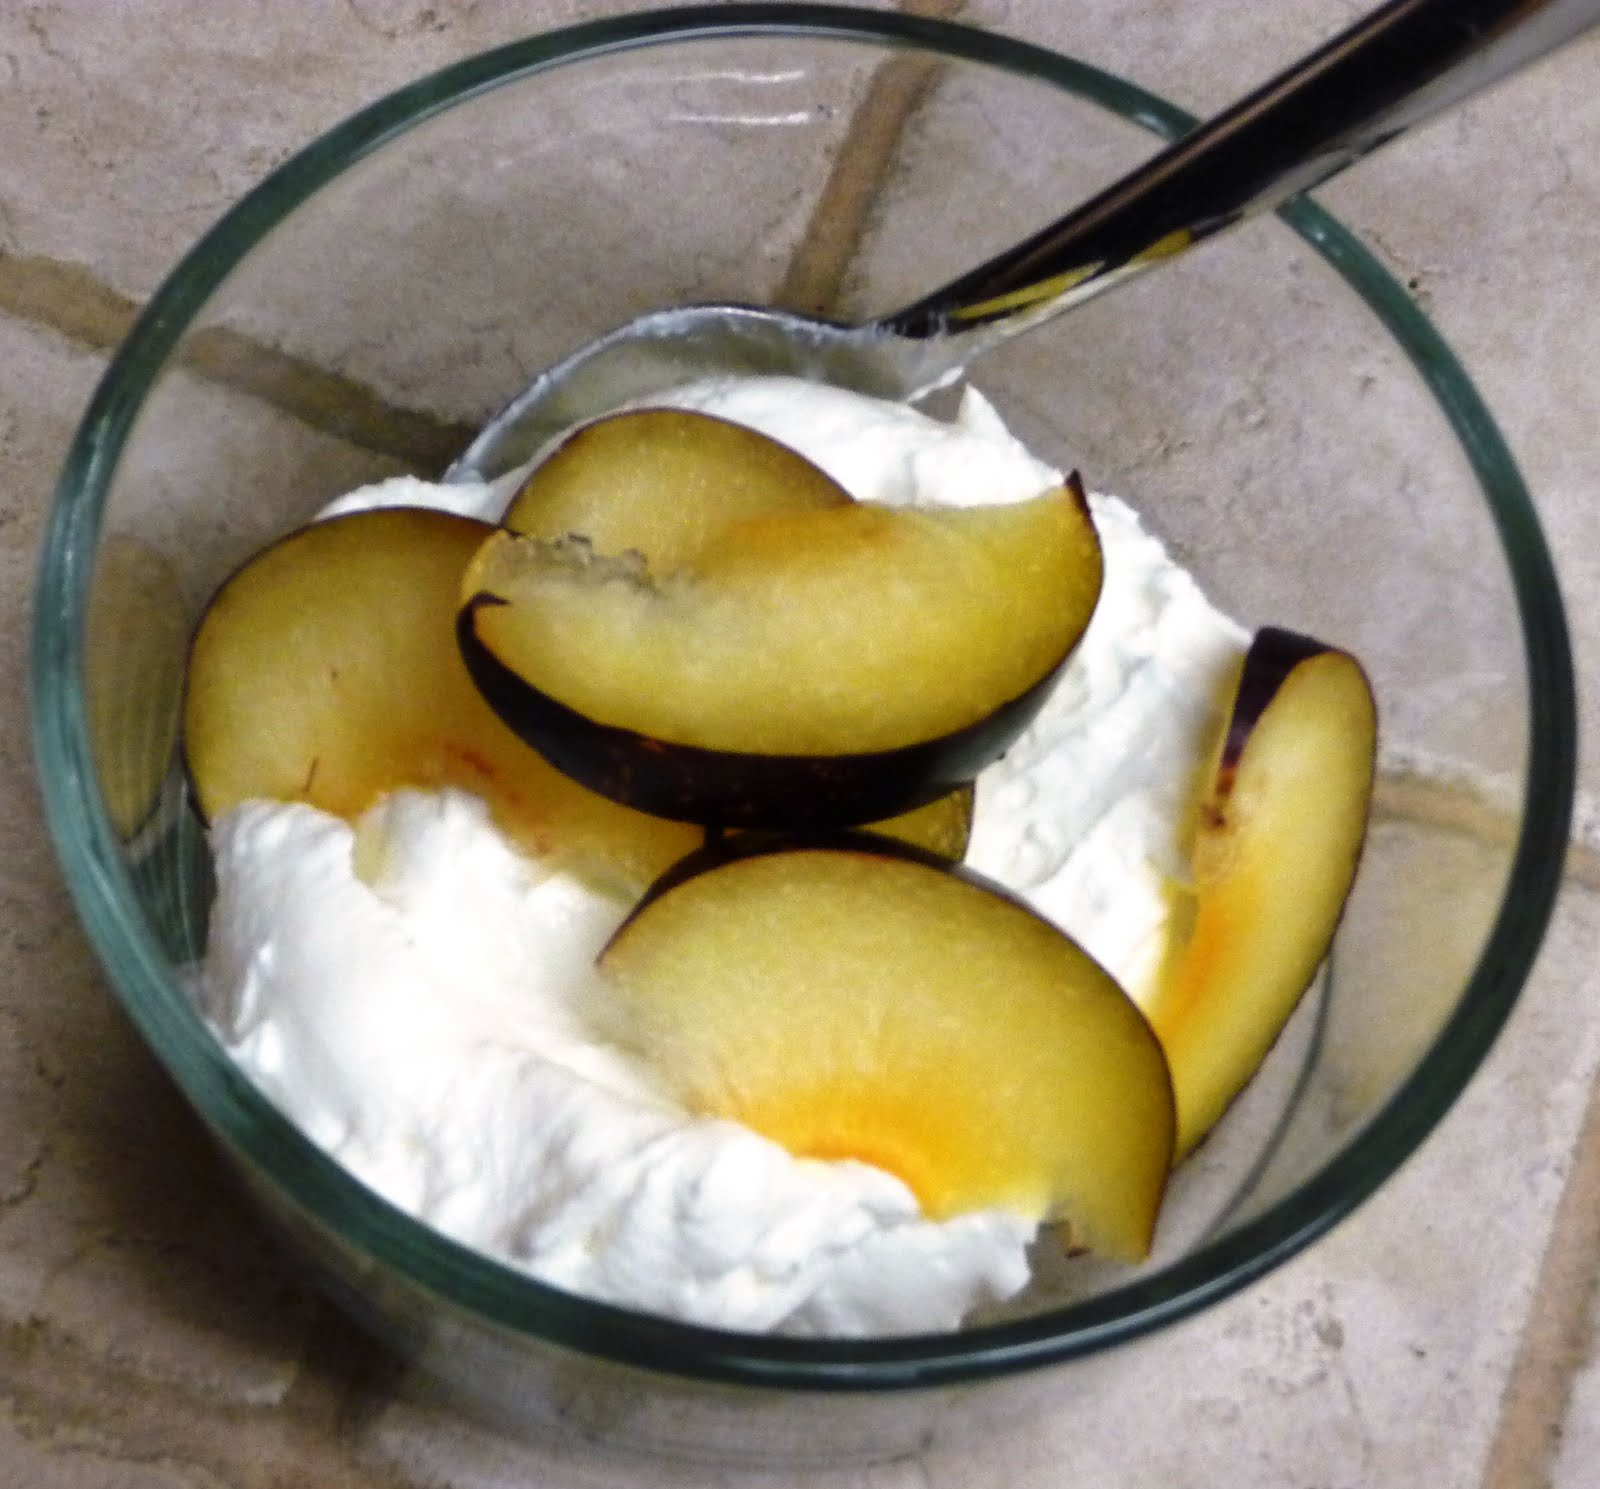
Behold, Greek yogurt that is so thick and yummy, it tastes like cheesecake! I added a sliced plum and a little to Splenda to this:


I'm going to re-type the recipe and directions here, but full credit goes to Sheena's recipe, which you can see HERE. And her photos are WAY better than mine!

What you'll need:

1/2 gallon milk (I used 2%, but next time I'm going 1%)
4 Tbsp of any plain yogurt containing live active cultures (I used Yoplait Greek Plain)
A heavy-bottomed stock pot w/ lid
A thermometer
A colander
Cheese cloth or flour cloth
A bath towel

This is so simple....and my second batch (20 min) was TWICE as fast as my first batch (40 min), because I knew what I was doing without reading the instructions 5 times.

Start by mixing 4 Tbsp plain yogurt and 4 Tbsp milk in a small bowl. Set aside and let the mixture come to room temperature. (On your next batch you'll be able to use 4 Tbsp of your homemade yogurt as your starter.)

Heat your 1/2 gallon milk on Med/High heat until it reaches a boil. I take mine off the heat just before the boil, at 200 degrees. I stir often after 180, to avoid scorching/burning.


Once you reach 200 degrees, remove from heat and place in a sink with cool water. This will cool the milk in a few minutes. I found that stirring while heating, then stirring while cooling prevents any skin from forming on the top. If a skin does form, just remove and dispose of it.

Once the temperature has cooled to between 105 - 100 degrees, add your yogurt starter mixture that you set aside earlier. Stir to combine with the heated milk. (The reason you cool the milk before adding the yogurt starter is that the hot milk will kill the culture.)


Immediately place a lid on the pot and wrap the pot in a big bath towel. Place the wrapped pot inside your oven and turn on the oven light. Now let it sit in the oven for 16 hours. The towel and the light will maintain ~100 degree temp. It will still feel warm when you remove it from the oven the next day - this is when the MAGIC happens!


When you pull it out of the oven it will be totally congealed and look like the top of a yoplait yogurt. If you like regular yogurt, you can just put it in an airtight container and the fridge and eat it this way.

If you like the thick consistency of Greek yogurt, this is when you strain the whey from the yogurt. I line a colander with a flour cloth and place it over a tall pot. Dump the yogurt into the lined colander, cover and place in the fridge for 6-8 hours. Make sure the pot is tall enough that the colander won't sit in the liquid at the bottom of the pot.

This is what it looks like 8 hours later.


Ready to bottle. Ready to eat. Ready to share.

Worried about eating something that fermented overnight - out of the fridge? Guess what? ALL yogurt is made using a controlled fermentation process! Check this out:

The most important step in the yogurt making process, and what creates the characteristics consumers think of when they imagine yogurt, is the introduction of the bacteria. The bacteria consume natural milk sugars and excrete lactic acid, which causes the milk proteins to begin to curdle and create a more solid mass. At the same time, the increased acidity of the dairy is too high for most harmful bacteria, so the yogurt keeps itself clean.

Enjoy!

Friday, September 10, 2010

QUINOA: You've All Been Holding Out On Me

Who knew how yummy QUINOA was and didn't tell me?

I heard rave reviews about Karen's quinoa salad on Labor Day, so I ran right out [sent my hubby] to the local health food store to find some quinoa. Of course, he first had to Google it, because he was SURE I was pronouncing it incorrectly [I wasn't]!

Quinoa Salad with Mango and Black Beans

2 cups quinoa [
cook according to package directions]
1 mango, diced
1 cup green onions, diced
1 red pepper, diced finely
1 bunch cilantro, chopped
1 can black beans, rinsed and drained

Dressing
3 Tbsp red wine vinegar
2 Tbsp olive oil (or grapeseed oil)
2 tsp salt


I used a 50/50 blend of white and red quinoa.
Soak the quinoa for 15 minutes in cold water. Rub it well between your hands.
Rinse and drain about 3 times until the water runs clear -- this removes the saponin, which has a bitter taste (and can cause stomach problems...the saponin protects the seed while it grows, but comes off with a good rinse and scrub).

Bring 3 cups of water to a boil. I added 2 chicken bouillion cubes.
Add quinoa, cover tightly with a lid and simmer for ~12 minutes.
Remove from heat and let sit, covered, for 5 minutes.
Fluff with fork and let cool.
I learned the hard way that it's better to err on the side of under-cooking it, rather than over-cooking it. It can get mushy.


While the quinoa cooks and cools, dice the other ingredients and make the dressing.

Mix together the veggies and dressing. Add to fluffed quinoa. Fold in black beans.


Yum!

You'd better believe I'll be experimenting with more quinoa recipes.

I'm going to order some pre-rinsed quinoa on Amazon NOW.