Friday, April 30, 2010

How "Carl" turned out

Carl's sourdough starter is GASSY! I mean, I have NEVER had my dough rise like this. Mine usually doubles in size, at most. I think this quadrupled!
Look at that tight air bubble in the saran wrap.
I decided to try a technique I've been reading about, which is basically folding the dough in the bowl, rather than spreading it out on a floured surface. This results in no four on the dough and is supposed to help it not deflate, since you never touch it with your fingers or smash it.
I split the dough in half, and separated the two loaves with a piece of parchment paper. This didn't turn out as well as it did when I actually folded and shaped the loaves...folded and shaped made a nice heel on both ends. This turned out looking like I'd just cut a big loaf in half, because the dough just ran together in it's loose, wet form.

Overall, I'm not entirely impressed with the 'no touch/no flour' method. The bread actually rose less in the oven, which surprised me. The crust isn't as pretty. However, I have to say that it tastes just as good as any I've made in the last few weeks. Jimmie said he can't tell a difference. Both are nice and sour, have a crispy crust and a chewy center. The only major difference I see it the crust appearance and the size of the holes....little holes here, which means it didn't have much 'oven spring.' Again, surprising, because not touching it and not adding flour are supposed to keep the dough 'wetter' which is supposed to make bigger air pockets while it bakes.


Tomorrow I'll bake two batches (one with MY starter; one with CARL's starter) and use the same folding method I've been doing. I am going to have Jimmie taste test and try to determine which is which.

I love that it only takes 5 minutes to make a batch of this dough. And I love that it's fat free and contains whole wheat. Awesome.

Monday, April 26, 2010

Get Dehydrated Sourdough Starter - FREE

UPDATE---> Check out Carl's starter at the bottom of this post. Already looking awesome and bubbly after only 48 hours and two feedings. NICE!


So, there once was a guy named Carl. Apparently, he had a pretty killer sourdough starter. How killer was it? SO killer that, after he died, his friends committed to keep it going.

In fact, for the price of a SASE, you can get some of Carl's dehydrated 1847 Oregon Trail Sourdough Starter, although it could take up to six weeks. 'Carl's Fiends' is a group of rotating volunteers who check a P.O. box about once a week. When they have enough requests to make it worth their time, they mail a small sample (about 1 tsp) to anyone who sends a SASE.

Mine came a few weeks ago. I'd ordered it before I even made my own wild starter. I finally got around to reconstituting it tonight. That consisted of mixing 1/2 tsp dried starter with 1 Tbsp lukewarm water. [Important: Do not use tap water. Always use filtered or purified water to feed your starter.] Once it softened and dissolved I added 1 Tsbp flour. It should come to life and bubble after about 2-3 days of feedings. Cross your fingers. It'll be fun to compare his starter to mine.

If you'd like some, too, send a #10 44 cent SASE to:
Oregon Trail Sourdough
P.O. Box 321
Jefferson, MD 21755


Sunday, April 25, 2010

Whatever Works!

I got my new covered clay baker and proofing basket this week and couldn't wait to try them.

Of course, it was 65 degrees in the house, and it needs to be 70 - 80 for the dough to rise. Time to pull out the space heater. The laundry room is the smallest room in the house and easy to heat up with the dryer running (without heating the rest of the house). WHATEVER WORKS!


The loaf in the back rose in the proofing basket ( you can see the bamboo pattern).
The loaf in the front rose in a glass bread pan.
Both baked in the cloche. Yum!


As a side note, I think I broke my fridge yesterday. I yanked out a piece of Pergo that was probably only 2 inches underneath the fridge, but right under the front foot where the door hinge is located. For whatever reason, now the door won't seal. There was a 1/4" gap. The fridge is 10 years old and hasn't had a great seal for a while now...too much weight in that big door.

I had to go to Lowes anyway, so to tide us over until we are ready to buy a new fridge, the child safety lock will have to do! It's kind of a pain to buckle it every time we close it, but....WHATEVER WORKS! Better than duct tape, I tell ya.

Wednesday, April 21, 2010

New Gadgets

My poor husband.
Last Friday night he said, "What do you want to do tonight?"
I replied, "I'm making my first loaf of sourdough!"
Saturday evening he asked if there was anything I wanted to do.
I said, "I need about an hour to get my dough proofing and then...."
"Oh, it's a BREAD night....," he lamented.
But, he hasn't complained about eating it all week. :)
We shared the last two slices over dinner tonight.

Good thing for him he has flight training all weekend...now he won't feel ignored and neglected while I experiment with my new gadgets!


Friday, April 16, 2010

My Very Own Sourdough Bread!

The highly anticipated [by me] inaugural loaf of sourdough has just come out of the oven! Woot, woot! And, get this....it does a little 'snap, crackle, pop' as it cools.

Yep, it's as delicious as it looks, even if I do say so myself! Jimmie agrees that it tastes as good as any San Francisco sourdough we've tried.

It's amazing to think there are only 3 ingredients in this bread: Flour, Water, Salt. That's it.

The starter contains only flour and water. I'm thrilled that I was able to cultivate wild yeast. Here it is before I stirred the bubbles out of it.

I researched many different websites for the best method and no-knead recipe. Most of what I did came from Breadtopia. There are some very helpful videos on that site that actually show the entire process and give tips for caring for your starter.

Combine 3 1/2 cups of flour and 1 1/2 tsp salt in medium mixing bowl.
[I used 1/2 cup wheat flour and 3 cups bread flour.]


Stir the bubbles out of the starter so it deflates.

Measure 1/4 cup of starter.

Pour the starter into 1 1/2 cups purified water.

Stir until dissolved.

Pour water/starter mix into flour/salt mixture.

Combine until dough forms a ball. THAT is a danish dough whisk. Love it. When it gets to tough for the whisk, finish kneading with floured hands and form into a ball. Dough will be sticky.

Cover dough with plastic and let rise at room temperature for 18 hours.
Sourdough is a day-ahead event!

This is what the dough looked like after 9 hours (when I woke up this morning).
9 more hours to go.

Here's the dough after rising at room temperature for 18 hours.

Gently turn the dough out onto a floured surface. It should be VERY sticky, which requires a lot of flower on your hands and sprinkling on the dough to handle and shape.

Carefully spread out (with floured fingers), not using a lot of pressure (maintaining some air in the dough).

Fold into thirds. (A dough scraper comes in very handy, because the dough is so soft and sticky that it is hard to lift with your fingers.)

Then fold in half. Now you have 6 layers of dough. It probably shouldn't have quite that much residual flour on it....I'm sure I'll get better at this with practice!

Cover with plastic and let sit for 15 minutes.
Grease a bowl or proofing basket and sprinkle wheat bran to keep the dough from sticking. Use a dough scraper to carefully lift dough and place into bowl for proofing (not pictured). Gently shape it into a roundish blob. [If you put the seams of the dough up in the bowl, they'll end up on the bottom of your loaf of bread when you invert the bowl onto the baking stone. I'll remember that next time!] Cover with a wet towel and let rise for 1 1/2 - 2 hours. Check at 1 hour and if it looks like it's almost ready, start pre-heating oven and baking stone to 500 degrees (this takes about 30 minutes for me).

Carefully invert bowl so dough falls onto hot baking stone without burning your hands. Spray with a water bottle every minute for the first 5 minutes.
Bake for 30 minutes at 500 degrees.
Then decrease heat to 450 and bake for 15 additional minutes.
Cool on wire rack.
Life will never be the same. Really. I'm so excited about how wonderfully this bread turned out that I've already made a second batch of dough to bake tomorrow and I may or may not be able to sleep tonight. Giddy.
I can't wait to experiment with garlic sourdough, olive bread, jalapeno bread...you get the idea. No more $4 - 5 per loaf. I plan to teach Jimmie how to make it, too....teach a man to fish, right?! He's pretty excited that we could live on bread [using wheat from our food storage] if we had to. ;)

Thursday, April 15, 2010

...because it is Thursday...

I made sourdough blueberry pancakes for dinner
(Yes, WITH my wild sourdough starter!)


Then I sat and read a book for 45 minutes while I stirred
a pot of dye for a little project [I'll tell you about when it's finished].

And finally, I fed my sourdough starter one last time before making my FIRST batch of sourdough! It'll rise for 18 hours and be baked Friday night. Woohoo!


Tuesday, April 13, 2010

No Occasion Strawberries

There was no special occasion.

I was staring at a carton of GIANT strawberries I'd purchased this morning, when I saw (out of the corner of my eye) a bar of European dark chocolate still sitting on my desk since our trip in Nov. Then I remembered that I still had a few bars in the bottom crisper of the fridge at home.

And that was all it took. Not exactly photo-worthy, but the taste makes up for the imperfect presentation.

Wednesday, April 7, 2010

Pizza Dough Twists

Few doughs are easier and faster than pizza dough. So, that's what I made the other day for these little pretties that accompanied our Easter pot roast meal.

I made the dough in the morning and popped it into the fridge after it had risen about 30 minutes. Then, I brought it to room temperature before rolling it out and cutting it into 1 inch strips. I twisted the strips and let them rise for about 30 minutes while the pizza stone preheated to 500 degrees for 30 minutes. I covered them in melted butter, salt and [half of them] with a garlic and basil topping. Baked on the preheated stone at 500 degrees for about 10-12 minutes. They turned out beautfully golden and crispy on the outside; soft and chewy (but fully cooked) on the inside. Yum!


Pizza Dough

1/4 cup whole wheat flour

1 1/4 cups all-purpose flour

2 1/4 tsp RapidRise Yeast

3/4 tsp salt

1/4 tsp sugar

1/3 cup hot water

2 tsp olive oil

Combine flours, yeast, salt and sugar in food processor and mix. Combine oil and hot tap water. Gradually add in water and oil while mixing. When it forms a ball, knead for 1 additional minute. Let rise for 10 - 20 minutes, covered with a piece of plastic that has been sprayed with olive oil or cooking spray.

Tuesday, April 6, 2010

Mediterranean Wheat Berry Salad

We still had wheat berries in the fridge, so we made another salad for Sunday lunch. I'm pretty sure my husband has the shortest memory of anyone I've ever known, but he said, "This is the BEST thing I have ever eaten. Ever."

This is a rich and savory dish that is very filling. And it took about 5-10 minutes total.

Mediterranean Wheat Berry Salad

3 cups cooked wheat berries
6 Tbsp Olive oil
2 Tbsp Balsamic vinegar
1 carrot
1/2 an onion
3 green onions
1 red or yellow bell pepper
1 cup chickpeas
1/4 tsp salt
1/4 tsp pepper
2-4 Tbsp Crumbled Feta cheese

Dice the vegetables.
Saute in 2 Tbsp olive oil until onion is translucent. Salt and pepper to taste.
Remove from heat and add remaining 4 Tbsp of olive oil and 2 Tbsp balsamic vinegar.
Combine the vegetable mixture with wheat berries and let sit for 30 minutes, to absorb flavors.

Sprinkle with crumbled feta cheese, to taste. Serve at room temperature or slightly warm.

My Sourdough Starter Overfloweth

UPDATE #2: This is the method I used for my starter. I used fresh squeezed orange juice and freshly ground wheat flour. This site explains how it works.

UPDATE #1: Every time I'm about to give up on my starter, it comes back to life. Yesterday I fed it and it did nothing. Today I fed it and it DOUBLED! That means it's strong enough to bake bread. I'm putting it in the fridge tomorrow for a week and hope it will spring back to life when I return from a little R&R with my sister in NC. ;)


See how it doubled above the tape line?? 2 hours! :O

Last Sunday I was baking wheat bread for the first time. Later that evening I was reading about breads on the internet and stumbled upon some instructions for making sourdough bread.

We LOVE sourdough. It is, by far, our favorite kind of bread.

It is also expensive.

So, I got this crazy idea that I would try to make my own sourdough starter. Most of the sites I read said that using commercial (instant) yeast creates a less stable starter than cultivating your own. And so, at midnight last Sunday, I started my starter.

3 Tbsp freshly ground wheat flour
3 Tbsp freshly squeezed orange juice

That's it! Loosely cover and leave on the counter top while you feed it the first 11 days. I had exactly 11 days before leaving town for a week, so I was hoping it would be strong enough to put in the fridge by the time 11 days had passed.

The experts said it wouldn't really do anything (like start to bubble) until the 4th day. All I was to do was feed it every 24 hours. On the 4th day, I was to switch from orange juice and wheat flour to purified water (tap water can kill it if it contains chlorine) and white flour. I did.

I was becoming a bit discouraged when it really didn't seem like anything was happening on the 4th and 5th day. Truth be told, I'd kept forgetting about it, so sometimes the feedings were 36 hours, rather than 24. I thought I'd probably failed at my attempt and thought about buying some starter online. I fed it again last night, anyway. It grew a tiny bit. The theory is that after about 11 days of fermentation and feeding, it'll DOUBLE in size when you feed it, meaning it's ready to bake with.

Well, imagine my surprise today (7 days later) when I fed it and it just about doubled inside of an hour! Woohoo! We have created our own native wild yeast in one week!


It began to overflow this morning


Now that it's growing, I'm putting it in the jar that will live in the fridge after 11 days


Can you see those little bubbles?


That's a good thing!


In case you're wondering, you throw out about half of it every time you feed it (depending on how much you are using in your recipe and how much you want to reserve for the next time), since it doubles in size. This is how it keeps growing stronger over time.


My plan is to pull it out of the fridge mid-month, feed it for a few days to revive it, then give it a go on my first sourdough loaf! Now I really want to buy a clay baker and a proofing basket.

Saturday, April 3, 2010

How to Cook Wheat Berries

Wheat Berries are the whole wheat grains (kernels) left after the husks of the wheat have been removed (what you probably have in your canned food storage). They are loaded with fiber and nutrition.

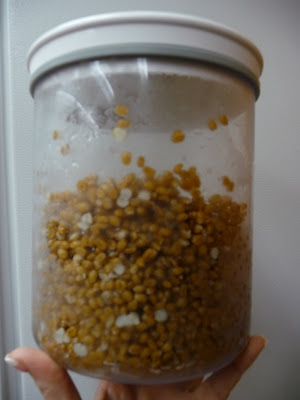
Cooking them into something edible is just as easy as cooking rice. Cooked wheat berries are chewy and have a nutty flavor. Nutrition facts per 1/2 cup: 151 calories, 1 g fat, 0 mg cholesterol, 29 g carbohydrates, 6 g protein, 4 g fiber, 265 mg sodium, 2 mg potassium.

For 1 cup of wheat, add 3 1/2 cups water, 1/2 tsp salt and bring to a boil. Cover and reduce heat to a simmer for 90 minutes (give or take 15 minutes). You'll have to taste them to know when they're done....it depends on how chewy you like them. If you cook them longer than 2 hours, they're likely to become mushy. When they're cooked to your liking, drain off the water. Eat hot or refrigerator for later. They should keep in the fridge for 2 days (I say 3-4 days in a vacuum sealed Food Saver container) or 30 days in the freezer.

1 cup of wheat makes 2 - 3 cups, because they expand when they cook.


I cooked my wheat ahead of time and refrigerated it in a food saver canister to keep it fresh for several days...but not before I had a bowl of hot wheat berries sprinkled with sugar and cinnamon. Yum-o!


Another wheat berry recipe coming soon!